A Quick Intro To JWT
Learn about the popular authentication method.
JSON Web Tokens(JWT) are a proposed standard for representing authentication claims between two parties.
Let’s break down what that means.
In the world of authentication you can think of claims as statements a user makes about themselves. A common example is a user claiming to be associated with a specific email address and therefore getting access to certain data.
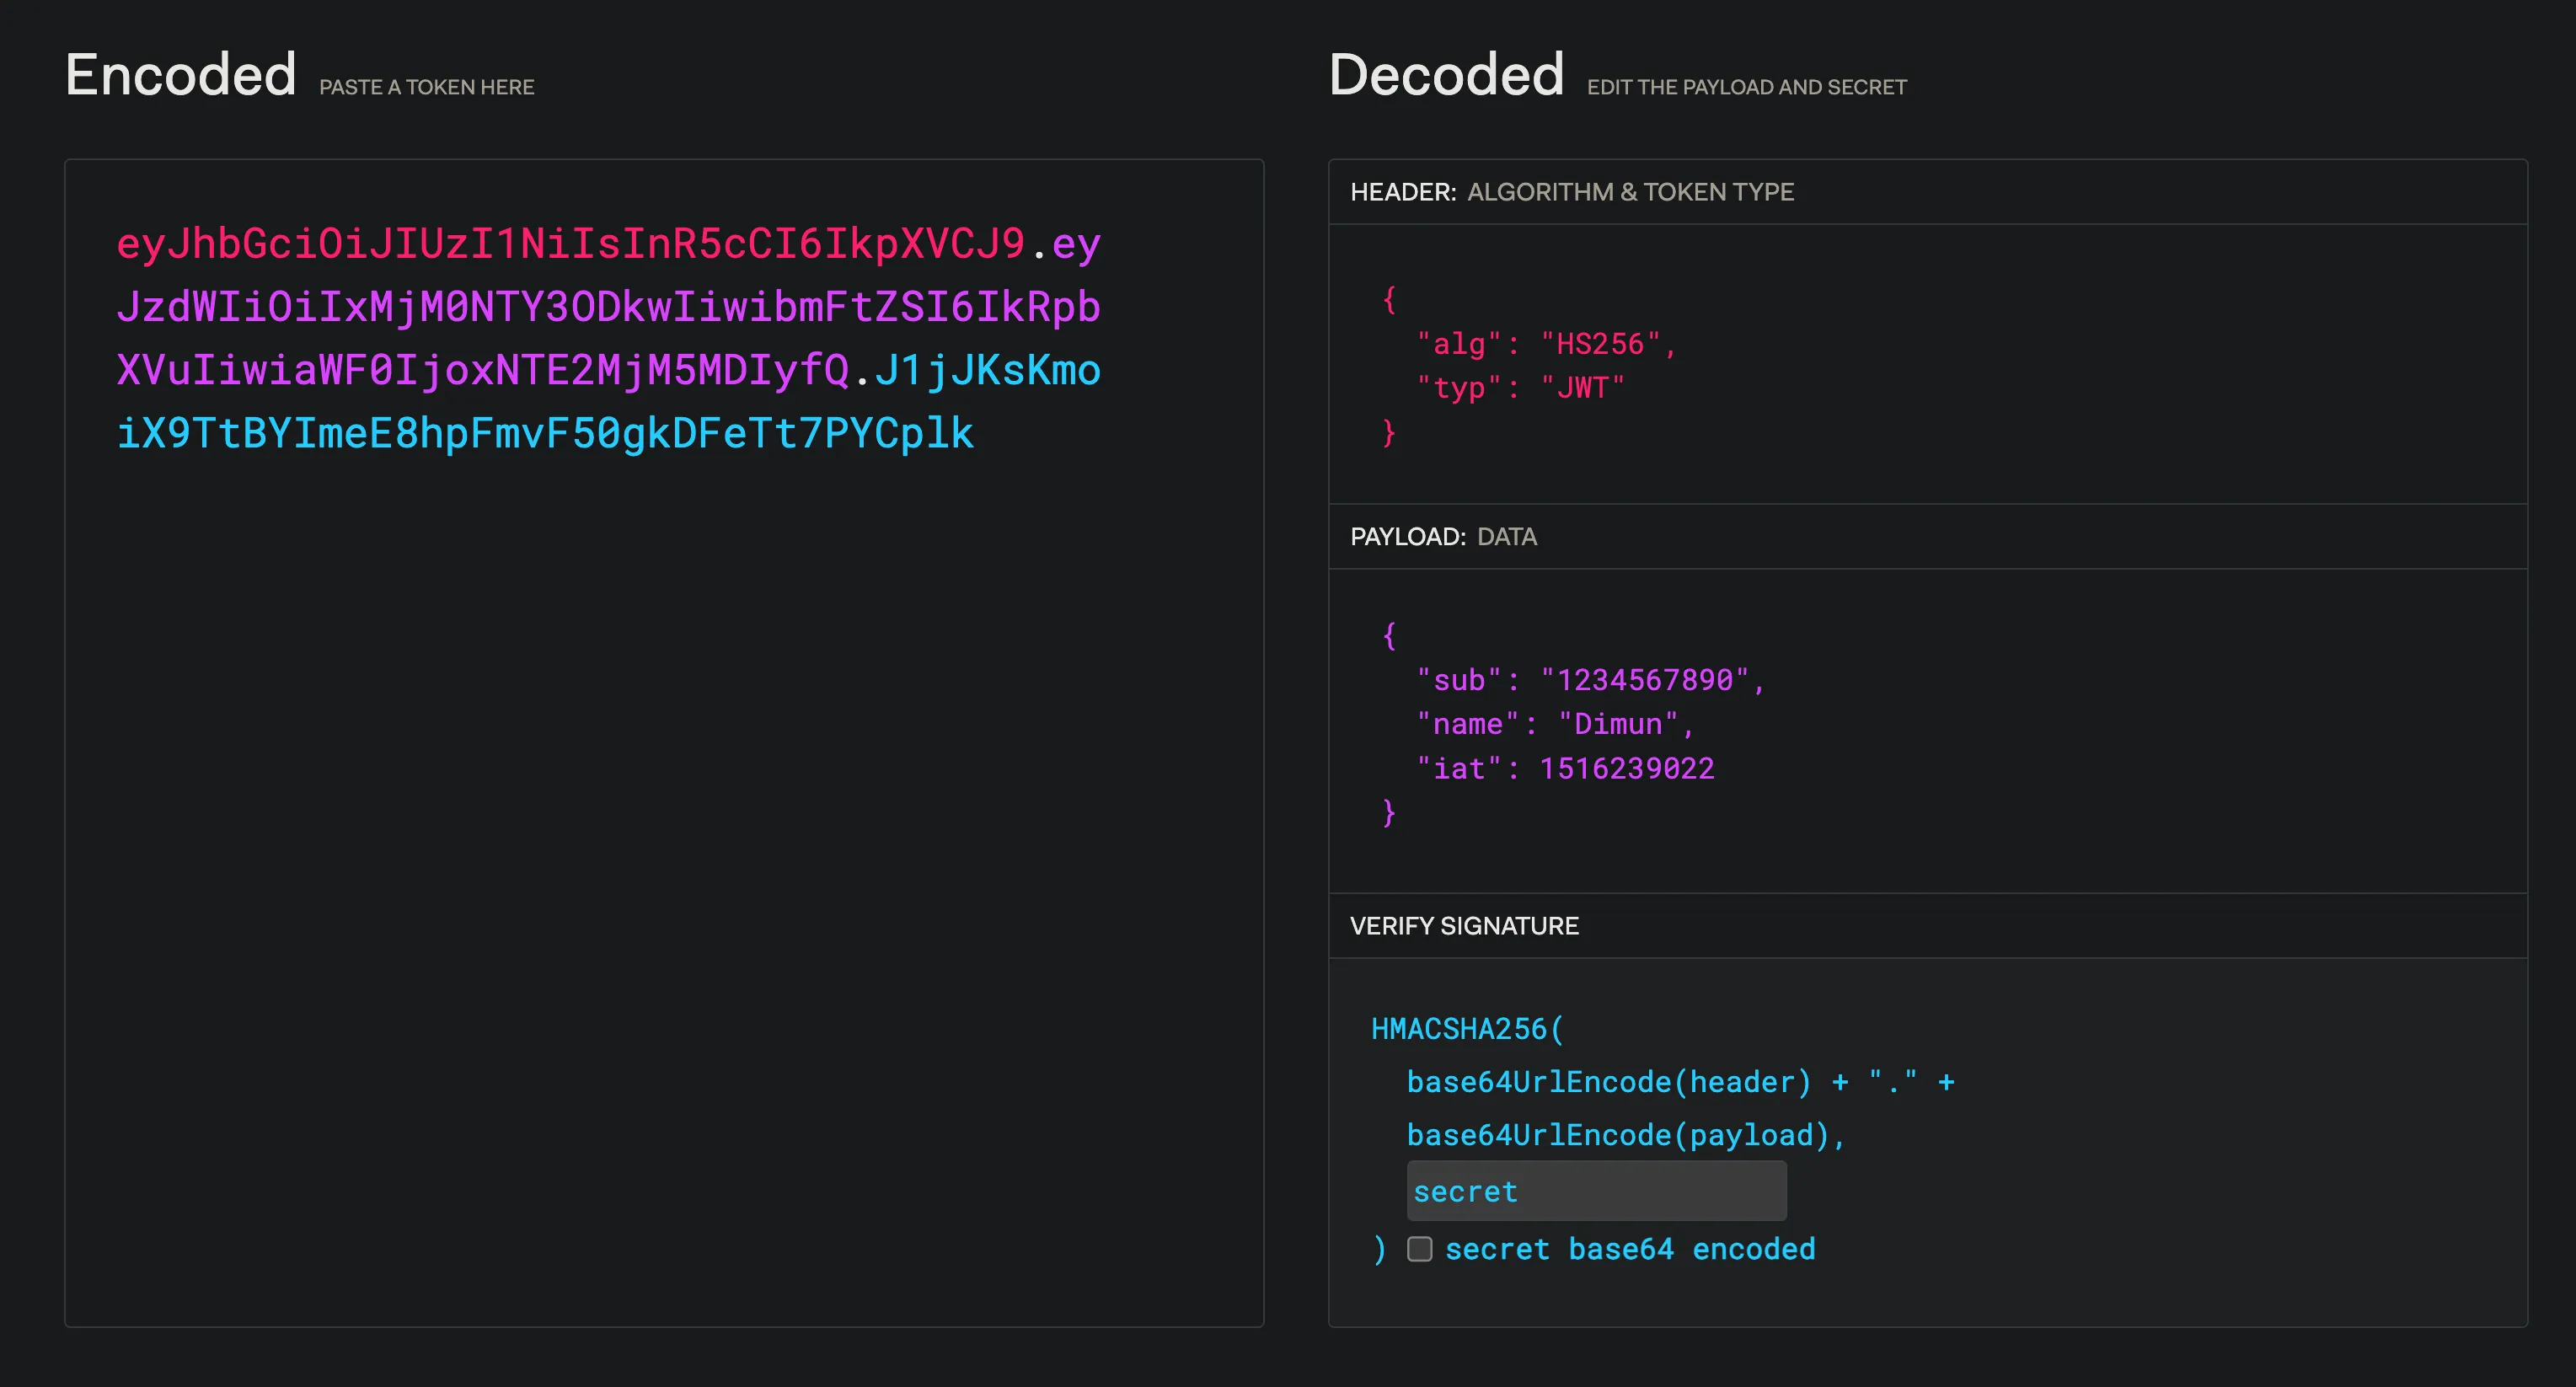
We’ll come back to claims in a bit but in the meantime take a look at the JWT example below.
eyJhbGciOiJIUzI1NiIsInR5cCI6IkpXVCJ9.eyJzdWIiOiIxMjM0NTY3ODkwIiwibmFtZSI6IkRpbXVuIiwiaWF0IjoxNTE2MjM5MDIyfQ.J1jJKsKmoiX9TtBYImeE8hpFmvF50gkDFeTt7PYCplkThe JWT consists of a Header, Payload and Signature which are all Base64Url encoded and separated by a ”.” as seen above. Lets dive deeper into each of these sections.
Header
The Header section contains metadata about the token such as the type and hashing algorithm used. Here is an exampe Header:
{
  "alg": "HS256",
  "typ": "JWT"
}
This Header then gets Base64Url encoded to the value below and becomes the first part of our JWT.
// HEADER

eyJhbGciOiJIUzI1NiIsInR5cCI6IkpXVCJ9
Let’s move on to the next section — the Payload.
Payload
You remember the claims we discussed earlier? The Payload is the section that contains all the claims.
Here is an example of what a Payload looks like:
{
  "sub": "1234567890",
  "name": "Dimun",
  "iat": 1516239022
}
The object keys and values represent the claim name and claim values respectively.
There are three types of claims:
-
Registered: Officially defined by the JWT standard and can be found in the official list.
-
Public: Defined by users and should be added to the IANA JSON Web Token Registry.
-
Private: Custom claims defined at will and agreed upon only by the relevant parties.
The Payload then gets Base64Url encoded to the value below and becomes the second part of our JWT.
// PAYLOAD

eyJzdWIiOiIxMjM0NTY3ODkwIiwibmFtZSI6IkRpbXVuIiwiaWF0IjoxNTE2MjM5MDIyfQ
Let’s move on to the last section — the Signature.
Signature
The Signature is used to verify the contents of the message. The Signature is created by using the hashing algorithm with the encoded header, payload and a secret vlaue.
Here is one way of creating the Signature using the HMAC SHA256 algorithm with Node.js:
const crypto = require('crypto');

const signature = crypto
    .createHmac('sha256', 'YOUR_SECRET_VALUE')
    .update('ENCODED_HEADER_VALUE' + '.' + 'ENCODED_PAYLOAD_VALUE')
    .digest('base64url')
The Signature then gets Base64Url encoded to the value below and becomes the last part of our JWT.
// SIGNATURE

J1jJKsKmoiX9TtBYImeE8hpFmvF50gkDFeTt7PYCplk
Now join all three of these strings together with a ”.” in between and you have the completed JWT as seen below.
// COMPLETED JWT
eyJhbGciOiJIUzI1NiIsInR5cCI6IkpXVCJ9.eyJzdWIiOiIxMjM0NTY3ODkwIiwibmFtZSI6IkRpbXVuIiwiaWF0IjoxNTE2MjM5MDIyfQ.J1jJKsKmoiX9TtBYImeE8hpFmvF50gkDFeTt7PYCplk
With the completed JWT you can use this in requests so that your service can read the values in the token as a form of authentication.
Lastly I wanna share the debugger at JWT.io that can be used to verify the token and can also create your own by adjusting the values.
That’s all I have to share for now.
Feel free to @ me on twitter if you found this post helpful or if you have something you’d like to see me write about.
Until next time, keep improving and never stop learning.
— Mo